Checking Out Rancher 2.0 with Kops AWS Clusters
One of the hallmark features of Rancher
2.0 is its ability to consume
Kubernetes clusters from anywhere. In this post, I’m going to walk you
through using the popular kops tool to create and manage Kubernetes
clusters on AWS and then bring them under Rancher 2.0 management. This
walkthrough will help you create a non-HA Kubernetes cluster, though
kops does support HA configurations. With this new cluster, we will
run the Rancher 2.0 tech preview in a pod with a persistent volume
claim.
Prerequisites
To follow along, you will need a properly configured kops setup, as
outlined in the kops AWS Getting Started
Guide. The
AWS guide will walk you through setting up:
- AWS CLI configuration
- Working DNS managed by Route 53
- IAM roles configured for EC2 resources
- The S3
kopsState Store - Installation of the
kopstool - Installation of the
kubectlCLI
Creating Your Rancher-Kubernetes Cluster
First, we will set some environment variables to make typing less
painful on the CLI. Set a NAME for your cluster:
export NAME=rancher-management.k8s.cloudnautique.com
If you do not already have one, create a state store bucket:
aws s3 mb s3://cloudnautique-s3-bucket-for-cluster-state
Then, set an environment variable:
export KOPS_STATE_STORE=s3://cloudnautique-s3-bucket-for-cluster-state
Of note, for this post, I’m going to use real DNS managed by Route53.
The k8s.cloudnautique.com domain above is a managed Route53 zone.
Let’s create the cluster:
kops create cluster --zones us-west-1b --node-count 1 ${NAME}
This command generates a cluster in a single zone, us-west-1b, with a
single worker node. Next, actually deploy the cluster:
kops update cluster ${NAME} --yes
It will take 10-15 minutes to provision. Now would be a good time to
take a walk or get a cup of coffee. You can check the status of the
cluster using the command:
kops validate cluster
Here’s an example for this cluster:
```
> kops validate cluster
Using cluster from kubectl context: rancher-mgmt.k8s.cloudnautique.com

Validating cluster rancher-mgmt.k8s.cloudnautique.com

INSTANCE GROUPS
NAME            ROLE    MACHINETYPE MIN MAX SUBNETS
master-us-west-1b   Master  m3.medium   1   1   us-west-1b
nodes           Node    t2.medium   1   1   us-west-1b

NODE STATUS
NAME                        ROLE    READY
ip-172-20-54-160.us-west-1.compute.internal master  True
ip-172-20-56-231.us-west-1.compute.internal node    True

Your cluster rancher-mgmt.k8s.cloudnautique.com is ready
```
Once the cluster is up and running, we can start interacting with it via
kubectl.
kubectl get nodes
To see the pods currently running, enter this command:
kubectl -n kube-system get pods
Now, let’s deploy our Rancher 2.0 server container. First, create a
namespace for our app.
kubectl create ns rancher-server
You can deploy the Rancher server stack below after you replace the
###YOUR DNSNAME### variable with the domain name you want to use for
the Rancher UI.
```
apiVersion: v1
kind: PersistentVolumeClaim
metadata:
  name: rancher-db-claim
spec:
  storageClassName: default
  accessModes:
    - ReadWriteOnce
  resources:
    requests:
      storage: 10Gi
---
apiVersion: extensions/v1beta1
kind: Deployment
metadata:
  labels:
    run: rancher-server
  name: rancher-server
spec:
  replicas: 1
  selector:
    matchLabels:
      run: rancher-server
  strategy: {}
  template:
    metadata:
      labels:
        run: rancher-server
    spec:
      containers:
      - image: rancher/server:v2.0.0-alpha7
        name: rancher-server
        volumeMounts:
          - mountPath: "/var/lib/mysql"
            name: rancher-db
            subPath: mysql
      volumes:
        - name: rancher-db
          persistentVolumeClaim:
            claimName: rancher-db-claim
---
apiVersion: v1
kind: Service
metadata:
  name: rancher
  annotations:
    dns.alpha.kubernetes.io/external: ###YOUR DNS NAME###
    service.beta.kubernetes.io/aws-load-balancer-proxy-protocol: '*'
spec:
  selector:
    run: rancher-server
  ports:
    - protocol: TCP
      port: 80
      targetPort: 8080
  type: LoadBalancer
```
After a few minutes, you should be able to visit
http://##YOURDNSNAME### and load up the UI. A future improvement
would be to add TLS termination at the ELB, which kops supports. You
can optionally register your management cluster into Rancher. This will
deploy the Kubernetes Dashboard, giving you access to kubectl from the
Rancher UI. To do so, when you visit the Rancher UI, select Use
existing Kubernetes. Then, copy and paste the kubectl command that
displays, and run it from your CLI.
Adding a User Cluster
Now that we have a Kubernetes cluster to manage our Rancher server
cluster, let’s add an additional cluster for our user workload and to
checkout Rancher 2.0’s multi-cluster management. In this case, we are
going to deploy into the same VPC as the Rancher management cluster to
save on resources. Going this route is not a hard requirement for
Rancher. We will need the VPC ID. Assuming you have Jq installed, you
can use the following command:
export VPC=$(aws ec2 describe-vpcs --region us-west-1 --filters Name=tag:Name,Values="${NAME}" |grep -v ^kops|jq -r .Vpcs[].VpcId)
Then, let’s set our development cluster name environment variable:
export DEV_NAME=development.k8s.cloudnautique.com
Now it’s time to create our cluster:
kops create cluster --zones us-west-1b --node-count 3 --vpc ${VPC} ${DEV_NAME}
This time we still deploy to the same availability zone, but we will
deploy three worker nodes instead of just a single node. Also, we need
to edit out cluster configuration to ensure that our subnets do not
overlap.
kops edit cluster --name ${DEV_NAME}
You should see your VPCID and CIDR configured properly under the
following keys:
```
...
networkCIDR: 172.20.0.0/16
networkID: ${VPC}
...
```
If the networkCIDR is incorrect, now is the time to set it to the VPC
CIDR. You can find this setting by editing your management cluster
kops edit cluster. You also need to edit the subnets CIDR so that
it’s non-overlapping with the management cluster. For this, we set it
to 172.20.64.0/19. Now, let’s deploy our cluster:
kops update cluster ${DEV_NAME} --yes
It will take a few minutes to provision. While that is happening, you
can go to the Rancher UI and click Manage Clusters from the
Environment menu in the right-hand corner. 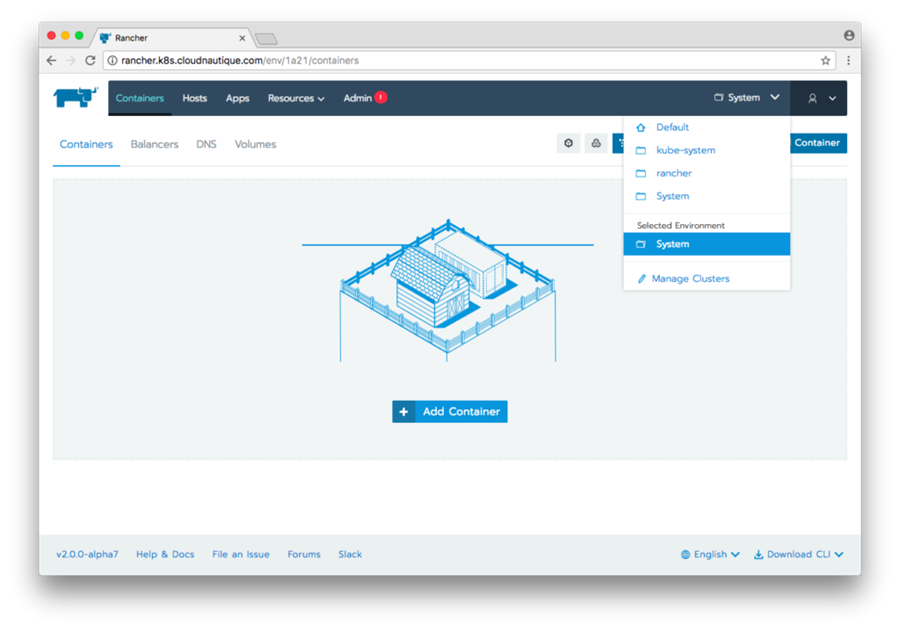 On the Clusters &
Environments page, click Add Cluster.  Provide the cluster
a name. 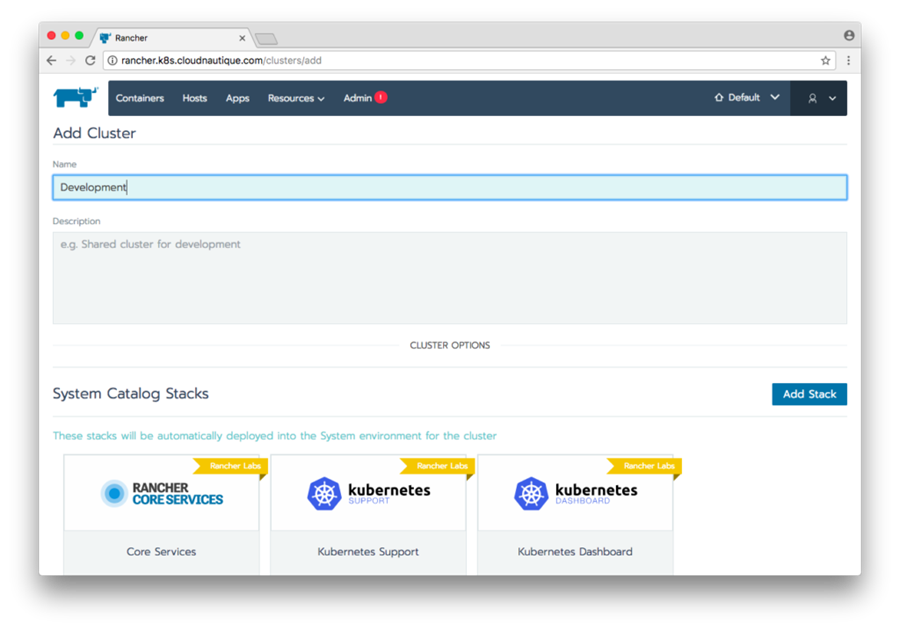 Select Use
existing Kubernetes to import your existing cluster.  Copy the command.
 Before running the
registration command, verify your kubectl command is using the correct
context:
kubectl config current-context
This should show the development cluster we created above. If it
doesn’t, go ahead and set it to the second cluster’s context.
kubectl config set-context ${DEV_NAME}
Replace NAME with the development cluster defined above. In the case
of this example, it is development.k8s.cloudnautique.com. On your
command line, paste the command copied from above and register your
development cluster. Now, when you click the Hosts tab, you see the
three hosts registered into the environment. 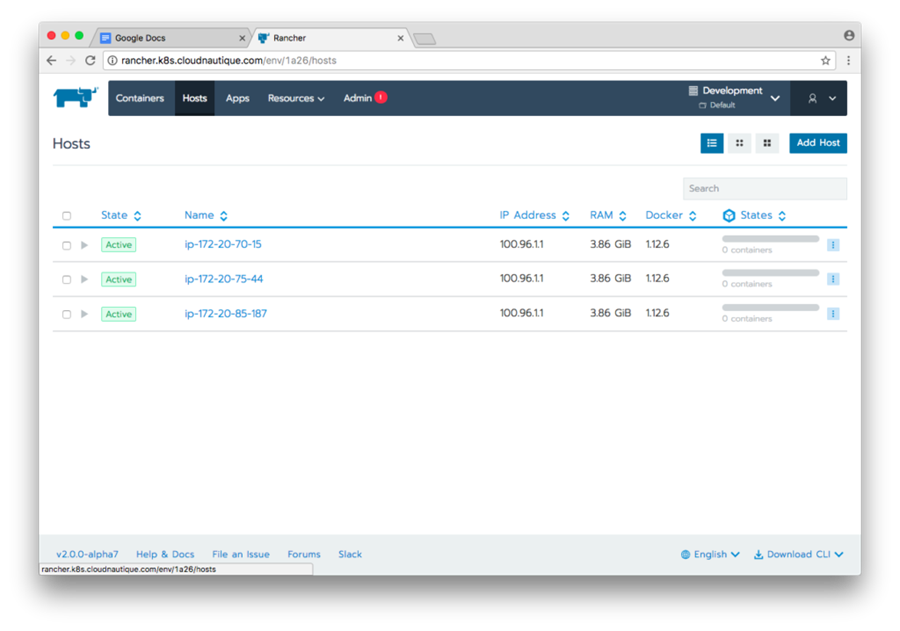 You are now ready
to use your Rancher environment to deploy apps from the Catalog, or from
your compose files. Once you are done playing, you can clean up all of
your resources with this command:
kops delete cluster ${DEV_NAME} --yes
Then, switch to the management cluster and do the same:
kops delete cluster ${NAME} --yes
Summary
Now you can see how easy it is to bring in multiple Kubernetes clusters
within Rancher 2.0. Kubernetes clusters from kops are just one type of
cluster you can use; you can consume Kubernetes from Google’s GKE,
DigitalOcean, or Azure. Rancher 2.0 continues to forge ahead with the
cross-cloud container story by allowing users flexibility to run to
where they need. We hope you’ll give Rancher
2.0 a try!
About the Author
 Bill Maxwell is a
senior software engineer at Rancher Labs. He has extensive experience in
software engineering and operations, and he has led continuous
integration and continuous delivery (CI/CD) initiatives. Prior to
Rancher Labs, Bill worked at GoDaddy in engineering, development, and
managing various cloud services product deployments. He holds a Masters
in Information Management degree from Arizona State University and has a
BSEE in Electrical Engineering from California State Polytechnic
University.
Related Articles
Dec 12th, 2022
Rancher Wrap: Another Year of Innovation and Growth
Apr 18th, 2023